
These represent a number of slip decorating techniques from slip trailing, brushing, sponging w/template, and I also threw in a few image transfers from a previous demo.
(click image to see next gallery pic)


Robert LaWarre III
Initiate ~ Inspire ~ Innovate
These represent a number of slip decorating techniques from slip trailing, brushing, sponging w/template, and I also threw in a few image transfers from a previous demo.
(click image to see next gallery pic)
This was a thrown altered tray from a previous demo. I love to build from one lesson to the next with these type of connections. I brushed on a layer of white slip and spattered the wet slip with a spray of water to create craters in the surface. Then I brushed on some black/blue slip to create a focal point on the side of the tray. The translucent glaze should pool nice in the craters and the cobalt in the slip will bleed out and streak down the form.
This is an example of slip trailing where I will tap the cup on the table top and the slip will run down the form. I also used an image transfer of a garbage can directly on the leather hard clay.....wetting the paper first and rubbing it out to get rid of air bubbles.
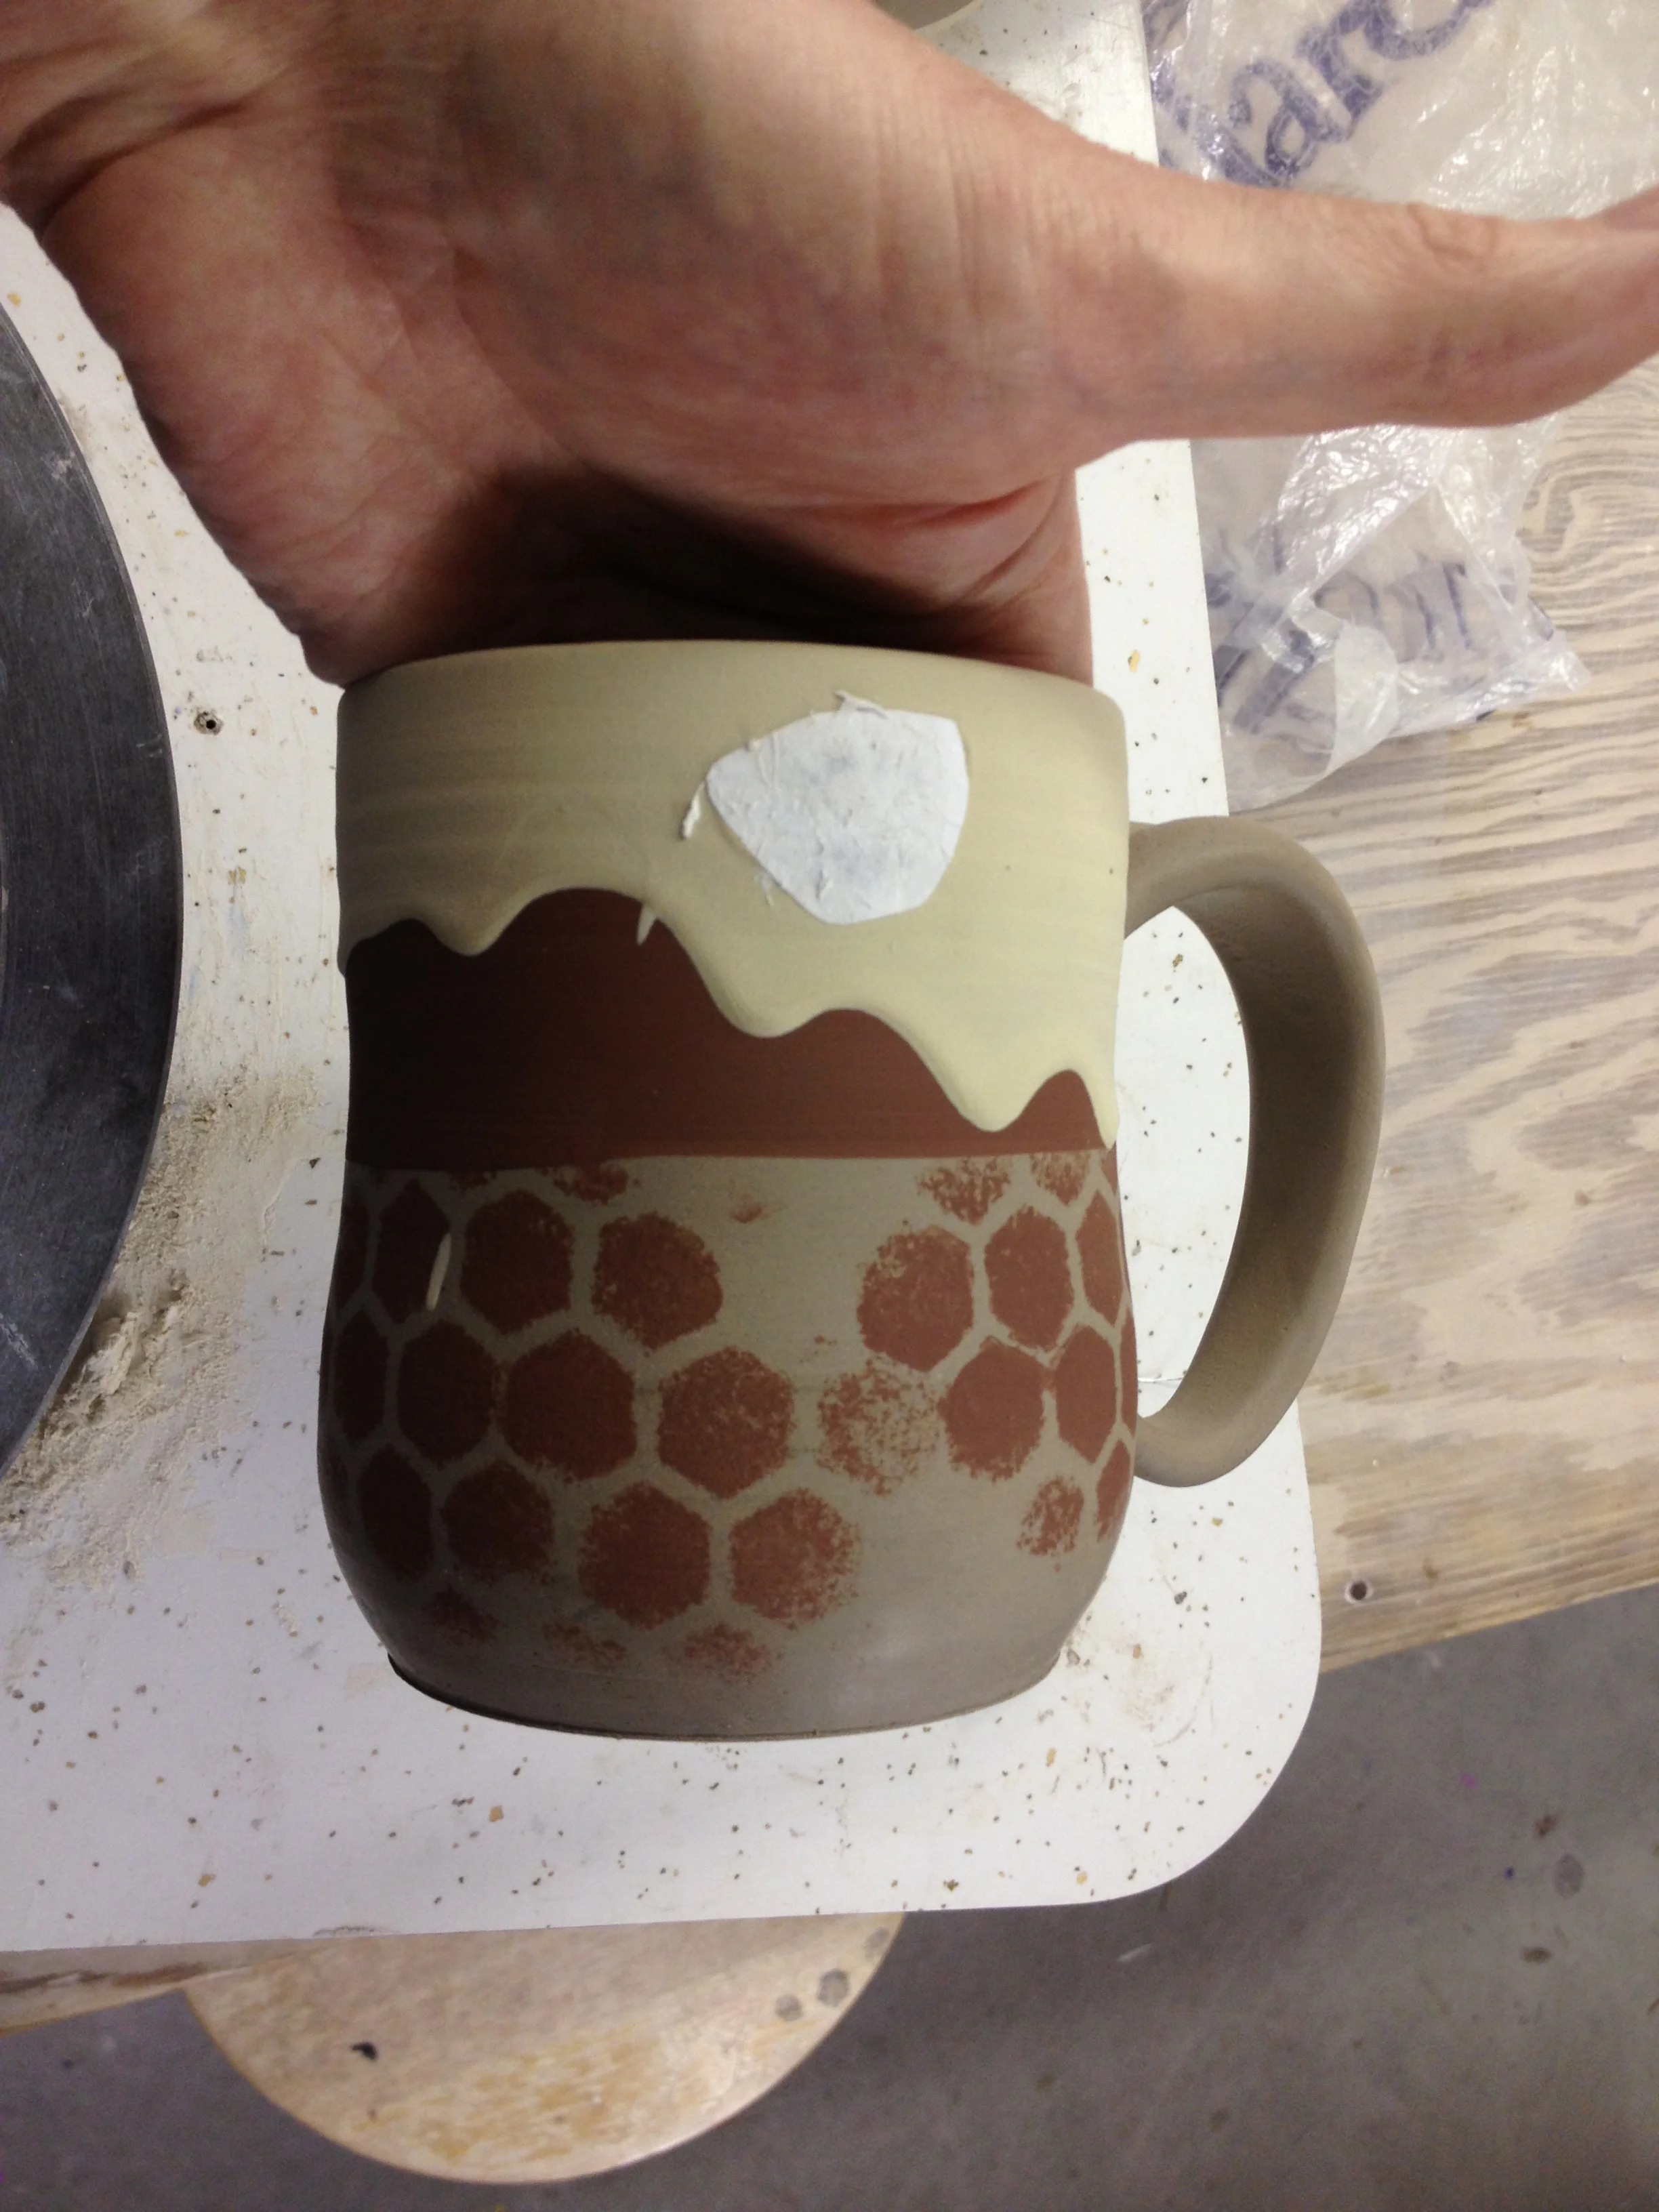
On this cup I was sharing the stenciling technique using a store bought template. Black/blue slip was sponged lightly over the stencil lightly as not to run under the stencil. this can also be achieved by cutting your own out of a heavy gauge plastic. The paper stuck to the slip in the upper right is an image transfer of a bee.
These are just fun for me...hence the jester reference. I'm pretty much a clown sometimes when do demos but its mostly to show other aspiring craftsman to have fun and play with the materials! I used wet newspaper strips on leather-hard clay to create a mask. Blue slip was applied when the surface was no longer shiny...the water soaked into the clay.....but still damp. I used a brush to apply the slip but a sponge can be used as well. Each gives a different surface. When the slip is leather hard the paper can be peeled off. A cleanup tool can be used to scrape off the areas where the slip travels under the paper.